


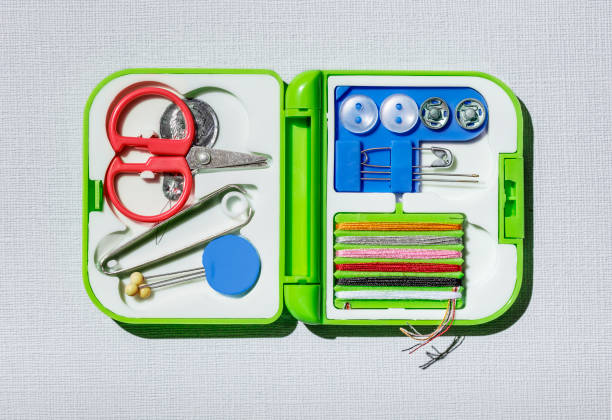

Every torn hem, lost button, and worn-out knee carries a hidden price tag when you default to tossing the garment and buying a replacement. Building a simple mending kit is one of the most powerful yet underrated money-saving strategies a consumer can adopt, transforming tiny household disasters into moments of thrifty triumph. Whether you are a complete beginner staring at a pile of “to fix” clothes or a seasoned bargain hunter looking to stretch your wardrobe dollars even further, assembling the right set of tools is the first stitch toward lasting savings. A well-curated mending kit doesn’t ask for a hefty investment, and many of its essentials can be acquired strategically using deals, cashback portals, and even items you already own. Instead of viewing repair as a chore, think of your kit as a mini emergency fund for your closet—one that pays for itself the moment you save a favorite pair of jeans from the landfill.
At the heart of any mending kit sits a thoughtful collection of needles. You don’t need a hundred specialized options, but a small assortment will handle the vast majority of repairs that save you from online shopping sprees. Look for a pack that includes sharps in medium sizes for general sewing, a few sturdy darning needles with larger eyes for knitwear, and at least one curved upholstery needle for tackling thicker fabrics like coat hems or backpack straps. Many craft stores place these multi-packs on seasonal clearance right after the holiday crafting rush, so it pays to keep an eye on weekly ads or stack a store coupon with a cashback app for an even sweeter deal. The needles you choose should feel comfortable in your hand and be made of rust-resistant material, since damp storage conditions can ruin a bargain find. Investing just a few dollars here eliminates the excuse of not having the right tool when a seam splits an hour before an event, which often leads to a panic purchase you’ll later regret.
Thread is the lifeline of any mending project, and building a frugal color palette is far simpler than novices imagine. Instead of buying dozens of single spools at full retail price, look for a small starter set that bundles black, white, navy, gray, and beige. These neutral shades blend into most garments and allow you to stitch everything from a missing button on a dress shirt to a split side seam on a T-shirt without streaking color across the fabric. Polyester all-purpose thread offers strength and a bit of stretch, making it ideal for everyday clothing, while cotton thread can be reserved for delicate vintage finds or natural fibers. Thrift stores and estate sales are goldmines for vintage thread collections, but examine them carefully for signs of brittleness before buying. If you prefer new, hold out for a “buy one, get one half off” promotion at big-box craft retailers and combine it with a site-wide coupon code to shrink your out-of-pocket cost to a negligible amount per project.
Scissors are the workhorse of your kit, and trying to snip thread with dull kitchen shears will only fray your patience and your fabric. You truly need two types: a pair of sharp fabric shears reserved exclusively for cloth and patches, plus a small pair of embroidery snips or thread nippers that live inside the kit for quick thread trimming. Fabric shears can be a splurge-adjacent purchase, but they don’t have to be. Off-brand stainless steel shears with good reviews often perform beautifully for home mending, and you can frequently combine a store loyalty discount with a manufacturer’s rebate to bring the price well below that of premium brands. The thread snips, meanwhile, can be as simple as a foldable travel pair found in the clearance bin at a drugstore. The real frugal secret is maintaining them: get into the habit of wiping the blades with a soft cloth after use and hiding them from family members who might be tempted to cut paper. Sharp scissors prevent jagged edges that lead to bigger tears and more complicated—and costly—repairs down the line.
No mending kit is complete without a seam ripper, a tiny tool that saves you far more than its minimal cost by letting you undo mistakes without damaging the fabric. Even expert stitchers reach for it constantly, and for a mending newbie, it is the ultimate frustration reducer. When a repair goes sideways, the seam ripper cleanly removes stitches so you can try again, keeping you from abandoning the project and buying a replacement garment. Pair it with a small pincushion and a set of glass-head pins. The pins allow you to hold patches, hems, and seams in place before stitching, ensuring a professional-looking result that makes your clothes feel new and discourages impulsive shopping. A classic tomato-style pincushion comes with a tiny attached strawberry filled with emery for sharpening pins—an all-in-one solution that often sells for a couple of dollars and lasts decades.
A flexible measuring tape is another quiet money-saver because so many mending disasters start with guesswork. When you need to turn up a trouser hem or position a patch symmetrically, accurate measurements prevent lopsided fixes that scream “homemade” and tempt you to hide the garment at the back of the closet forever. Look for a tape with both metric and imperial markings, and check discount fabric stores where these are frequently impulse buy items near the checkout for under a dollar. Similarly, a thimble might feel old-fashioned, but it protects your fingertip when pushing a needle through dense seams and gives you the control to stitch faster. Leather thimbles mold to your finger shape over time and are far more comfortable than rigid metal versions, and they often appear in sewing notion grab bags at thrift shops for pennies.
The final category to consider is mending fabric and specialty reinforcements. This is where your kit bridges the gap between basic repair and creative upcycling, extending the life of garments that would otherwise drive you to a shopping cart. Scraps of lightweight fusible interfacing can be ironed behind rips in shirts or dress linings, stabilizing weak spots before they become catastrophic holes. For denim and trousers, keep a few iron-on denim patches on hand—supermarkets and discount stores frequently stock them in the laundry aisle, and a single patch can rescue knees that look destined for the trash. Don’t overlook the value of a darning mushroom or a smooth wooden egg for mending socks and sweaters; the curved surface mimics the shape of a heel or elbow and makes it straightforward to weave new threads into thinned areas. If a darning tool isn’t in the budget, a clean, smooth light bulb or a small glass jar can serve the same purpose beautifully without costing a single cent. When you begin to see every frayed cuff and tiny moth hole as a challenge rather than a death sentence for a garment, the savings compound quickly. The humble safety pin, an assortment of spare buttons harvested from old shirts and packaged in a tiny zip-top bag, and a small piece of beeswax to strengthen thread and prevent tangling round out a kit that fits inside a repurposed cookie tin or a zippered pencil case found at a deep discount.
Building your mending kit doesn’t require a grand shopping spree. By layering store coupons, timing purchases around end-of-season clearance at craft chains, and rummaging through estate sales or your own junk drawer, you can assemble a lifetime of garment rescues for the price of a single fast-fashion impulse buy. Each time you reinforce a thinning elbow or sew on a button while watching television, you are actively delaying the need to open a browser tab and hunt for a replacement. In an era where every dollar counts and consumer culture pushes a buy-and-toss mindset, the most essential tool in your kit is the mindset shift that sees a loose thread not as a reason to spend, but as an opportunity to save. That transformation starts with a handful of thoughtful tools gathered wisely, and it pays dividends every time you zip up that mended jacket and walk out the door with your budget fully intact.